Posted in Photo
Getting creative with cropping is yet another way to expand the possibilities for your finished photographs. Although we usually think in terms of standard crops and keeping photos in the same ratio as they come out of the camera, there are many other options. Today, we’re exploring some of the creative geometric possibilites and ideas for creating uniquely finished photographs.
/>
Aspect Ratio
Before we get started with putting together our custom crops, we have to have an understanding of the term “aspect ratio.” The concept of aspect ratio refers to the shape of a photo, and is usually expressed as a pair of numbers, such as 4:3. A photo with that aspect ratio would be 4 inches wide for every 3 inches tall. That ratio will hold true whether we’re speaking in terms of inches of prints, or pixels in a digital file.
Leaving photos in their default aspect ratio keeps the image size large and leaves the most room for cropping, but can be somewhat limiting of our creative possibilities. Our explorations today will revolve around some of the lesser utilized cropping options.
If there’s such a thing as a “trend” in aspect ratios, the popular photo sharing service Instagram has pushed users to shoot in the square format of old, 1:1. Reminiscent of the Polaroid days, the square format is a different experience for creating images. It changes the outcome of the images and is simply unique in terms of what the viewer is presented.
/>
Custom Crops
Regardless of what aspect ratio your images are captured in, the power of the digital editing workflow gives us the ability to reshape our images. Cropping images is one way to completely change the experience of our photos.
We’re going to look at cropping in two stages. First, we’ll take a look at some of the custom shape options and explore ideas for creative crops, then check out some of the geometric overlays that we can apply for composition ideas.
Today, we’re using Adobe Lightroom 4 for all of our cropping, although the principles can be applied regardless. For all of the crops make sure you are working in the Develop module and press “R” on your keyboard to bring up the crop tool.
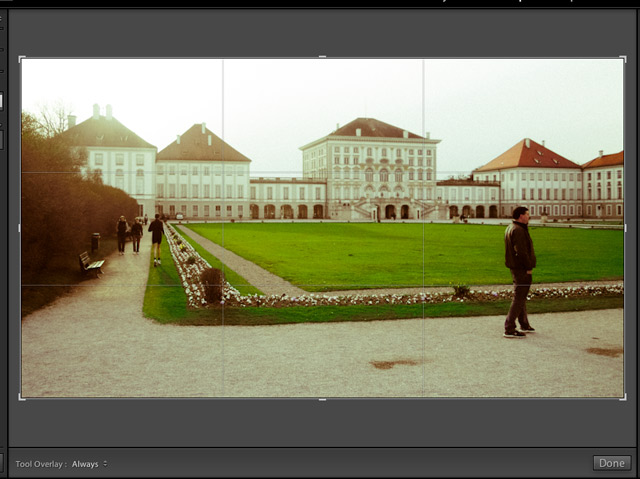
/> Pressing “R” on the keyboard gets the crop process started in Lightroom. The crop overlay will appear over the image, and pressing “R” on the keyboard again or the Done button below the image will apply the crop.
In general, you can crop an image by dragging the handles that appear on the corner of the image. Grab one and drag it in to select the area you want to crop the image. Pressing “R” on the keyboard again will finalize the crop and trim the image as you’ve selected.
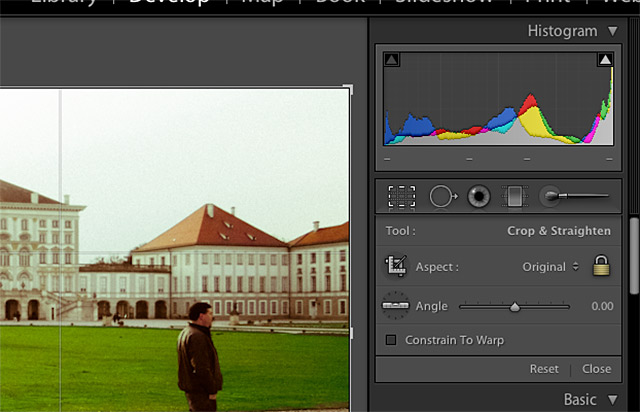
/> Options will appear on the right side of Lightroom, and you can click the lock to lock the image’s aspect ratio.
Once you’ve started cropping the image, there are a few settings you can utilize to change the cropping experience. One thing I typically do is press the lock icon to lock the aspect ratio, ensuring that the image’s aspect ratio will remain the same as I crop it. This is just where I start with the way I see things through a camera.
Locking an aspect ratio can be very helpful if you’re going to do a lot of printing. You can lock a 4:5 ratio and know that you’ll have perfect 8×10 inch images.
/>
Custom Shaped Crops
If you’re shooting with a DSLR as many of us probably are, the images coming out of the camera are 3:2 (or 2:3 if the image is rotated in portrait orientation). Many point and shoots shoot the 3:4 aspect ratio that is more square in nature. In either case, we can create custom crops to change the outcome of our images.
The more resolution you have to work with, the more options you’ll have to crop images and keep your image quality high. As you crop images further and further, you’re reducing the image size and thus losing pixels. With the high megapixel count of today’s cameras, this is less of a concern, but you should still be mindful of the resolution you’re working with throughout the cropping process.
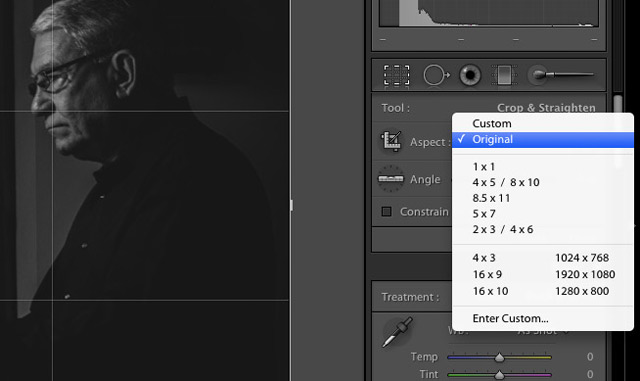
/> For each of these, we need to change the aspect ratio fo the crop by clicking on “custom” or “original” to the left of the padlock. Select the desired crop aspect ratio, and Lightroom will now allow you to use that selected ratio in the cropping process.
/>
Square (1×1)
First up, I think one of the most interesting crops is the aforementioned square format. With this aspect ratio, we simulate older style cameras, as well as the images that Instagram produces.
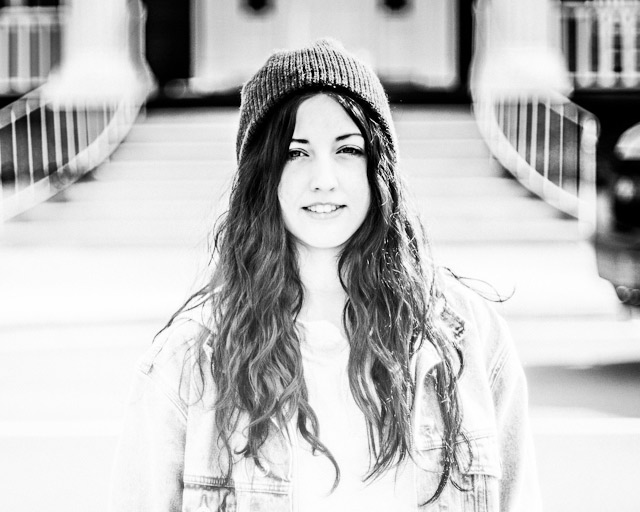
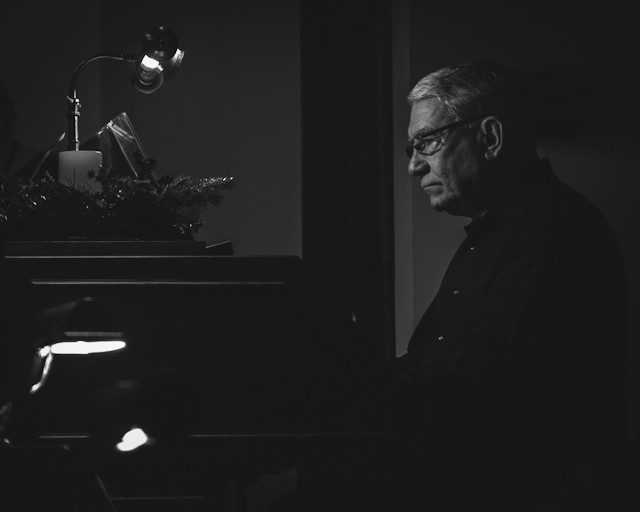
/> This photo by Forrest Lane shows off the square crop effect that I think showcases a subject more prominently. My eye is less drawn to the background and the surrounding regions than it might be otherwise.
When cropping to a square, I feel that the resulting image is straightforward in terms of focal point. Unlike wider crops where a subject can be placed in any region of the photo, a square crop is likely to feature the subject in the center and dominating the frame. I think that this is an interesting crop when you want to give the viewer a very clear message of what you’re trying to convey, focusing on an imposing subject.
/>
Super Wide (16×9)
Another of my favorite cropping styles is the widescreen 16:9 aspect ratio. Just like widescreen TV’s, this aspect ratio gives us a wide horizontal view for fitting more of the landscape in the photo.
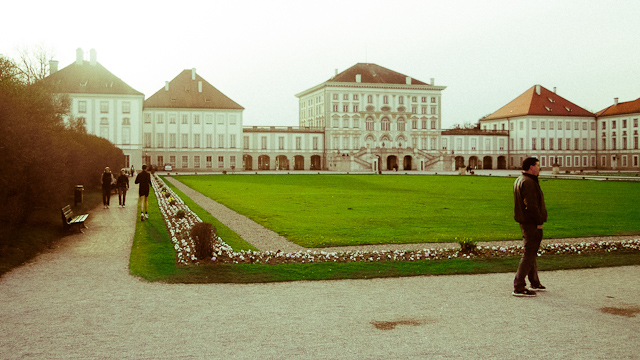
/> This ultrawide 16:9 crop by photographer Forrest Lane shows off the effects of using a wide aspect ratio to fit more horizontal scenery in the frame.
/>
5×4
Images that are 4×5 take us back to the days of large format photography, a time when the cameras were large and the resulting negatives were 5×4 inches. This time period popularized the common “8×10″ print, which follows the same ratio.
/> This photo by Forrest Lane shows off the pseudo square shape offered by a 4×5 crop.
Again, this is a format that is more square in nature than the modern day 3×2, so it can be thought of as a happy medium between square format and a wide shot. It’s yet another interesting aspect ratio that can render a different outcome for a familiar image.
/>
Mathematic Crops
A lot of ambitious photographers are always striving for better composition in their images. The problem that I’ve found is that it’s often subjective, situational, and difficult to find great advice on how to improve compisition. However, the crops below are great suggestions for improving the composition of an image in post production.
Each of the crop options below have mathematic roots behind them. Photographers sometimes disagree on the effectiveness of these, and they aren’t great for every situation. Sometimes, placing a subject in the corner of an image can make a strong statement in the right situation. Check out some of the cropping options below, but remember that they are not methods that apply to every photograph.
In Lightroom, we can change the grid overlay by pressing ”o” on our keyboard (that’s the letter O, not the number zero) after being in crop mode. As we cycle through, we are presented with different options that can be used for cropping.
/>
Rule of Thirds
One of the crops that many photographers know about is the rule of thirds. This composition rule suggests that if we divided the photo into a grid with lines running horizontally and vertically, that placing the interesting part of the photo along the intersection of these lines would improve our composition.
This is so popular and handy that your camera probably has an option to use these lines in the viewfinder or on the LCD. Another option in Lightroom is to use a wide rule of thirds type crop that pushes the thirds toward the edge of the frame.
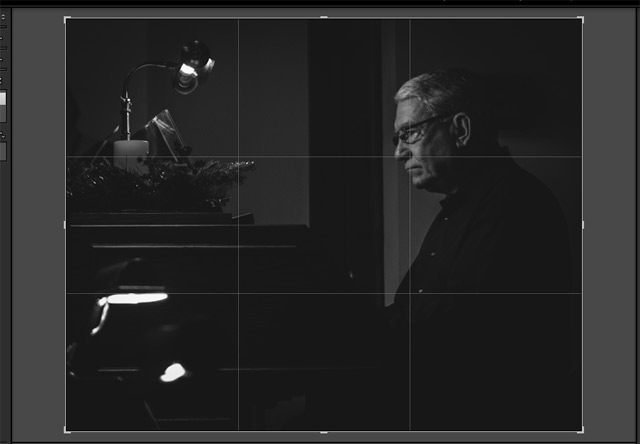
/> By default, opening the crop tool will overlay the rule of thirds grid. This is classic photographic advice that tells us that placing action at the intersection of these lines will render stronger compositions.
I’ve found that this is a great way to quickly improve your compositions. Keeping the “interestingness” along the intersecting points is an easy way to get better compositions, and it takes very little effort to do so. There’s something that just works about this rule, so don’t be afraid to align your final images along these points while cropping.
/>
Golden Ratio
Moving up in terms of sophistication, the Golden Ratio is a supposedly magic ratio that is rooted in the research of many great mathemiticians, such as Pythagoras, Euclid, and many others, the golden ratio is another crop overlay available in Lightroom (Wikipedia has a great write up if you enjoy the mathematics behind the ratio). The general rule of thirds is loosely based on the Golden Ratio as well.
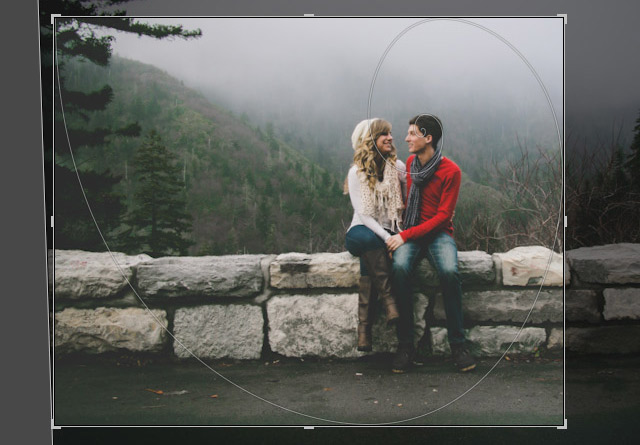
/> I aligned this photo to a golden ratio crop overlay. Do you think it improves the composition of this Forrest Lane photo.
Using this ratio in the cropping phase is a lot less straightforward than just applying the rule of thirds. When you bring it up, you’ll see a rather daunting overlay that’s resembles a spiral.
/>
Triangles
Another option in Lightroom is to use intersecting triangles as a grid overlay. This is similar to other options in that there are many intersecting lines, and the goal is to put your focal point upon these intersections to improve composition.


